From time to time, your lovely LED shower head can get clogged due to mineral deposits leaving it dirty and dingy. This will reduce its efficiency as jets won’t spray as expected. Though some clogs may not directly affect the heads’ efficiency, periodical cleaning will give your shower head an outstanding performance.
Clean an LED shower head in one of two ways. First, you remove it from the stem, soak it in a mixture of water and vinegar (50/50), rinse it and put it back. You can also tie a plastic bag filled with the same water/vinegar solution around the Showerhead overnight. Scrub in both cases if you wish.
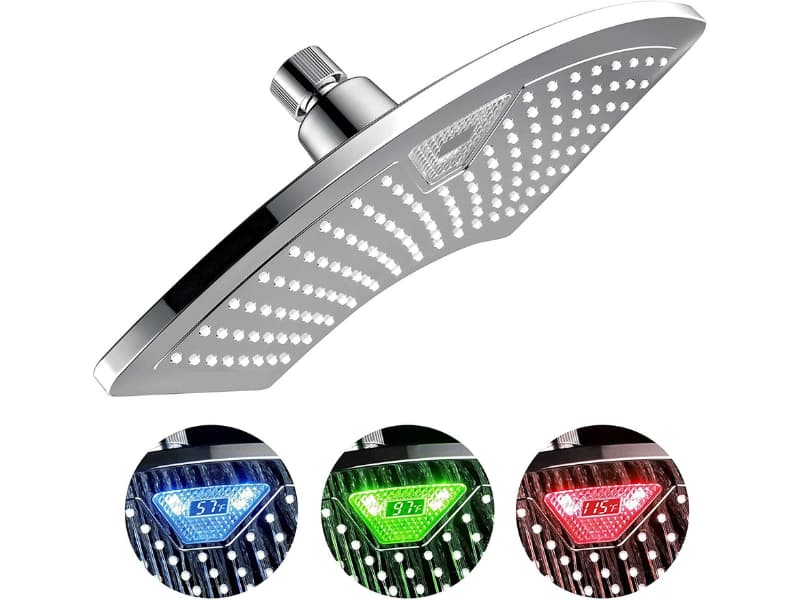
A good LED showerhead such as the Cobbe Shower Head is a joy. It changes color, filters water, and saves on water usage.
Cleaning your LED shower head is an easier task than you thought. The approach is simple to understand and practice, ranging from the few items you need to the cleaning procedure. Let’s dive in!
How to clean LED shower head
For this procedure, you need a freezer bag, vinegar, rubber bands, a soft toothbrush, pipe wrench or priers, cleaning cloths, and a bucket.
Method 1
The first method is as follows:
- Close the water source and electric supply, remove the shower head, and put it in a bucket or container with enough depth for complete immersion. Consider taking photos in this step if you feel it’ll be challenging to assemble the shower head.
- Warm the vinegar in a microwave, sprinkle it on the shower head, and allow it to soak for about 30 minutes.
- Use a soft cloth to get rid of loose deposits. Then, use a toothbrush to remove hardened deposits from the holes.
- Using the toothbrush, clean the filter screen. Use running water to remove mineralized deposits.
- Assemble the shower head. Use a thread seal or PTFE tape to avoid leakage. If necessary, use the photos taken to avoid errors.
You’ll have a clean LED shower on your hands.
Method 2
This method is convenient for anyone who isn’t willing to remove the shower head. However, it will take longer than the first method but can be used for other types of showerheads too. Although you will need the same supplies, you will use a plastic bag of gallon size alongside strong tape or rubber bands.
Follow these steps:
- Put some vinegar into the plastic bag, then carefully wrap the bag around the shower head. Ensure that the whole shower head is submerged in the vinegar.
- Use strong tape or rubber bands to hold the plastic bag. If you opt for tape, ensure it doesn’t hold the shower metal parts – this can leave behind a sticky adhesive residue that can later damage the metal finish.
- Since you are using cold vinegar, this process will take longer than expected. Leave it overnight or for at least 12 hours for the best results.
- After soaking the shower head, remove the plastic bag carefully and use the soft toothbrush to remove the hardened deposits. Use a cleaning cloth to wipe the showerhead.
- Open the water tap to allow the jets to be flushed clear.
You can repeat this process to get rid of all hard water deposits.
LED shower head installation and maintenance
LED shower heads require a perfect installation. You should follow the required guidelines for a proper installation. Also, they are easy to maintain with some of these tips:
- To remove an old shower, you will need to twist it. You can use a pipe wrench in some cases.
- Use a sponge to clean the supply pipe. Scrub off the old Teflon. Screw the shower head on the gasket if it is provided.
- Inspect for possible leakages after installation. The shower head should be tight enough to ensure no leakage. If you notice leakages, use Teflon tape around the supply pipe to seal it.
- Choose the correct type of showerhead for efficient water filtration. Allow only clean water to pass through the shower head. Installing the shower head with the proper guidelines and maintenance will ensure no obstruction to the water flow. The filter will eliminate 96% of chlorine. Also, it will filter any impurities and dirt without affecting the water flow.
- You need to verify the water pressure at your place. However, the shower head is designed to vanquish low-pressure issues until you acquire the correct pressure without any challenges.
Always buy a showerhead when you’re fully aware of the local environment. This includes the type of water (salty or non-salty) and the regulations (the highest flow rate in GPM allowed).
Why is the LED shower head not working?
Here are possible reasons why the LED shower head is not working and the possible fixes:
1. Leaking water supplies
An increased leakage will lead to more water waste, directly increasing water bills. Likewise, it will negatively affect the water pressure and flow. Higher water amounts may flow on the leaks than expected on the shower head. Consequently, you will observe water trickling on the shower head or see no water flow out of the shower head.
Besides a leaking water flow system, your heater tank may also leak. You should inspect the tank for dripping water and the surroundings for pooled water. If you notice signs of natural plants such as mold and algae, then the chances are that you have a leaking tank.
Fixes
Fix leaks as follows:
- Use fiberglass sheets to prevent plastic leakage.
- Apply putty/epoxy on the affected areas. If you use air-cultivated tubes, close them to get the desired amount.
- Heating for small cracks using soldering iron fills the crack when melting.
- Seek professional help if the problem persists.
Leaks have many downsides to your shower experience and expenditures and should thus be fixed as soon as possible.
2. A dysfunctional anode rod
An anode rod guards the water heaters against corrosion. This metal tube is made of magnesium or aluminum and is attached to the tank. Typically, it is used as an oxidizing agent for elements that can rust inside the tank.
In a nutshell, the anode rod gives itself away to the corrosion-causing elements. However, this metal rod’s sacrifice can last shorter than your water heater tank. Consequently, this leaves a dysfunctional anode rod in the tank that will cause the internal lining of the tank to rust.
Taking long without replacing the depleted rod will, in turn, cause the water heater to fail. At this time, you will realize shower problems such as rust-colored or foul-smelling water. In addition, a faulty water heater will cause fluctuations in the shower water.
Fixes
The fixes to a dysfunctional anode rod include the following:
- Inspect new anode rods at intervals of 3 to 4 months.
- Replace the anode rod that has thinned its original diameter.
- Consider hiring a heater repair specialist to change a dysfunctional rod.
Anode rods are often hidden hence why, without inspection, you may not know how to fix or replace them.
3. Clogged water supply lines or tanks
Minerals contained in hard water can block your supply lines or water tanks. For example, calcium and magnesium settle at the bottom of your water heater tank. Also, they can accumulate inside the supply pipes that supply water to your shower head, blocking them.
The symptoms of such clog build-ups are reduced water pressure in the shower. When you notice no water completely, the chances are that the pipes and tanks are fully clogged. In addition, this problem can affect the faucet.
Fixes
The fixes to clogged pipes include the following:
- Find the location of the clog and unclog the pipe.
- Consider contacting a licensed repair technician to clear the clogs.
- Consider regular inspections of anode rods for softer water.
- Replace anodes within one year.
The main fix to a clog is unclogging it. Do it yourself if you’re sure you’ll unclog the water lines without damaging the plumbing system. Otherwise, call for an expert.
4. Faulty shower valve
A broken valve cartridge or shower valve can make the shower dysfunctional. Typically, shower valves regulate the water temperature and flow in the shower by mixing cold and hot water. Later, the mixed water flows to the showerhead or shower faucet.
If you notice that your shower is releasing cold or hot water and it can’t turn off, then the chances are that the valve is broken. Also, faulty valves can make the shower handle produce an odd grinding sound and get stuck. Notably, if your valve dismantles and the pieces block the opening, you will notice reduced water pressure or flow.
Fixes
A faulty shower valve is fixed as follows:
- Replace broken valves.
- Repair the broken cartridge.
- Call a reliable plumber for repair.
Replacing a faulty valve can be complex and requires an expert to handle it.
Bottom line
Cleaning an LED showerhead is easier than you imagined. You must obtain the right tools and equipment and follow the right approach. Also, consider purchasing the best-LED shower head for long-lasting and efficient life. Notably, considering practicing the outlined maintenance guidelines will give your shower head a long life. Now, you can conveniently clean your LED shower head and enjoy its fascinating bathing experience!