Even if you regularly clean your bathroom tiles, filthy grout lines can severely ruin the appearance of your tiled walls and floors. Oil, grease, and water tend to penetrate inside porous cement-based grout, whether it has been sanded or not, resulting in unsightly discoloration.
The greatest defense against this is to seal your fresh grout and do it again as necessary. It would help if you reapplied the sealant frequently on your tile.
Start by cleaning and repairing the grout. Apply grout to the damaged areas, remove the excess, and let it dry. Choose the right grout sealer type and applicator. After that, apply several coats of the sealant, waiting for each to dry before the next one. Remove excess sealant, then let it cure.
Following these procedures, you may seal the grout to make a solid barrier against unattractive stains and a dingy appearance.
How to regrout a shower
Not all grout sealers are created equal. Some sealants are made to only function with specific kinds of tiles and grout. In light of this, before visiting a home improvement store to get a sealer, be careful to inspect your tile and grout.
After getting the right sealer, follow these steps to regrout and seal your shower:
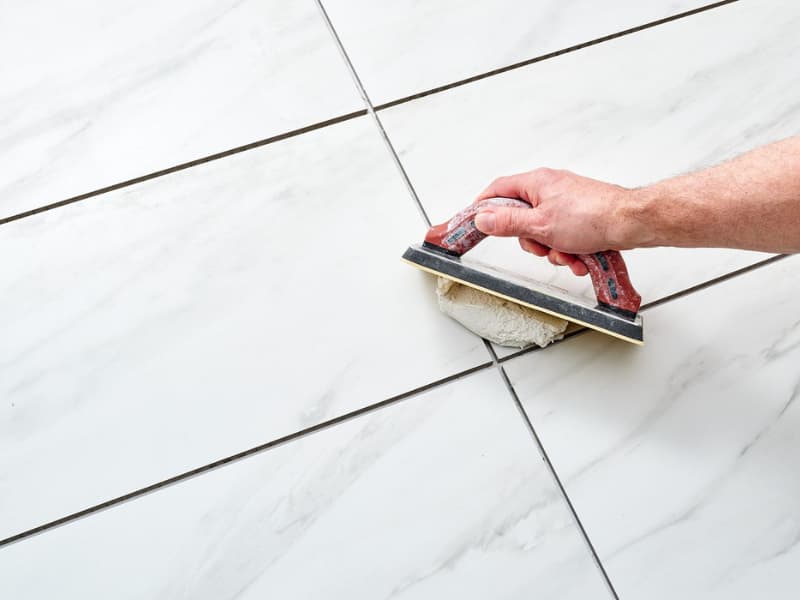
STEP 1: Clean and repair the grout
Before using a sealant, thoroughly clean your grout while filling in gaps or crumbles. If not, you’ll seal in grime and cracks in the seams. Scrub away as much dirt as possible with a toothbrush immersed in soapy water.
If you’re attempting to remove stains, switch to a solution of 50/50 vinegar and warm water. Focus on one grout line at once. After washing and sealing the grout, give the area 45 minutes to dry before sealing.
STEP 2: Choose the right grout sealer type
Secondly, obtain one of the top grout sealants suitable for the kind of tile you have. There is no perfect sealer for every circumstance.
When looking for grout sealers, you’ll find many options enabling customizations. The best sealers for marble, stone, and ceramic tiles are listed on the labels, along with the maximum amount of moisture each sealer can withstand.
STEP 3: Choose an ideal sealer applicator
The key to a successful grout sealing operation is selecting the right applicator. Many variables, such as the width of the grout lines and whether you’re working with sealed or unsealed tile, will affect the choice of applicator.
If your bathroom walls contain unsealed tiles and very thin grout lines, you can seal larger parts of your bathroom walls by washing over both surfaces at once with a sponge.
You only need to seal the grout lines on glazed tiles where the sealer won’t stick. The best tool for this is an applicator brush or a specific-purpose bottle with a wheel on top.
Step 4: Apply the sealant
A foam sponge or brush should apply the sealant to the grout lines. Ensure that the sealer forms an entirely and evenly covered waterproof barrier.
After letting the sealer sit for about 10 minutes, remove the excess sealer off the adjacent tiles using a dry towel.
If you omit this step, the tile will develop a layer that is almost impossible to remove and will become hazy.
STEP 5: Apply a second coat of sealant
After completing the first layer of sealer, wait an hour for it to dry completely before adding a second coat. For adequate protection, one to three coats of sealer are required.
STEP 6: Test the sealant
Apply drops of water to the grout to check the surface after the second coat of sealant has dried. Droplets of the liquid should form as it beads up. If not, add a third coat to guarantee good results.
STEP 7: Let the sealant cure fully
Check the manufacturer’s instructions on the grout sealer you use for details. Some sealers need 24 hours to cure, while others can take up to 48 hours.
Remember how convenient it will be the next time you clean your grout when you consider how inconvenient it may be to keep a room off-limits for a day or two. It takes less time to scrub with a suitable sealant.
Grouting tips
When grouting your bathroom tiles, follow the tips below. They’ve made my work so easy.
1. Once you set the grout, remix it
While grouting tile, you must ensure that the grout is properly set and mixed.
2. Tape off the areas you want to protect
While grouting, it’s possible to damage unexpected regions if grout spills on them by accident.
3. Work in small areas
Grout sets up quite rapidly once you apply it to the tile. You need to remove any extra grout when it starts hardening to prevent it from hardening in the wrong place.
4. Clean with minimal water
Using too much water when using a sponge to remove tile grout is one of the individuals’ biggest mistakes. As a result, the color will be uneven when the grout dries.
5. Don’t scrub when cleaning
While you are cleaning the grout, it can be tempting to scrub vigorously. Instead of effectively cleaning the grout, this will only move it, so use a soft sponge and softly press it against it.
5. Save some grout
After you’ve finished your grouting project, you should save some of the grout. Extra grout is useful if you need to make any touch-ups or utilize it for other projects in the future. Just keep in mind to store it in a tight container.
Conclusion
Even though it’s time-consuming, grouting your shower tiles and other surfaces will pay off in the long term. You’ve already completed the difficult part by learning to seal shower grout. You’ll love the results!